Templates
Template management is accessible as a tab on PageMailer’s settings page. You can find the app’s settings by following this step-by-step guide.
Creating templates
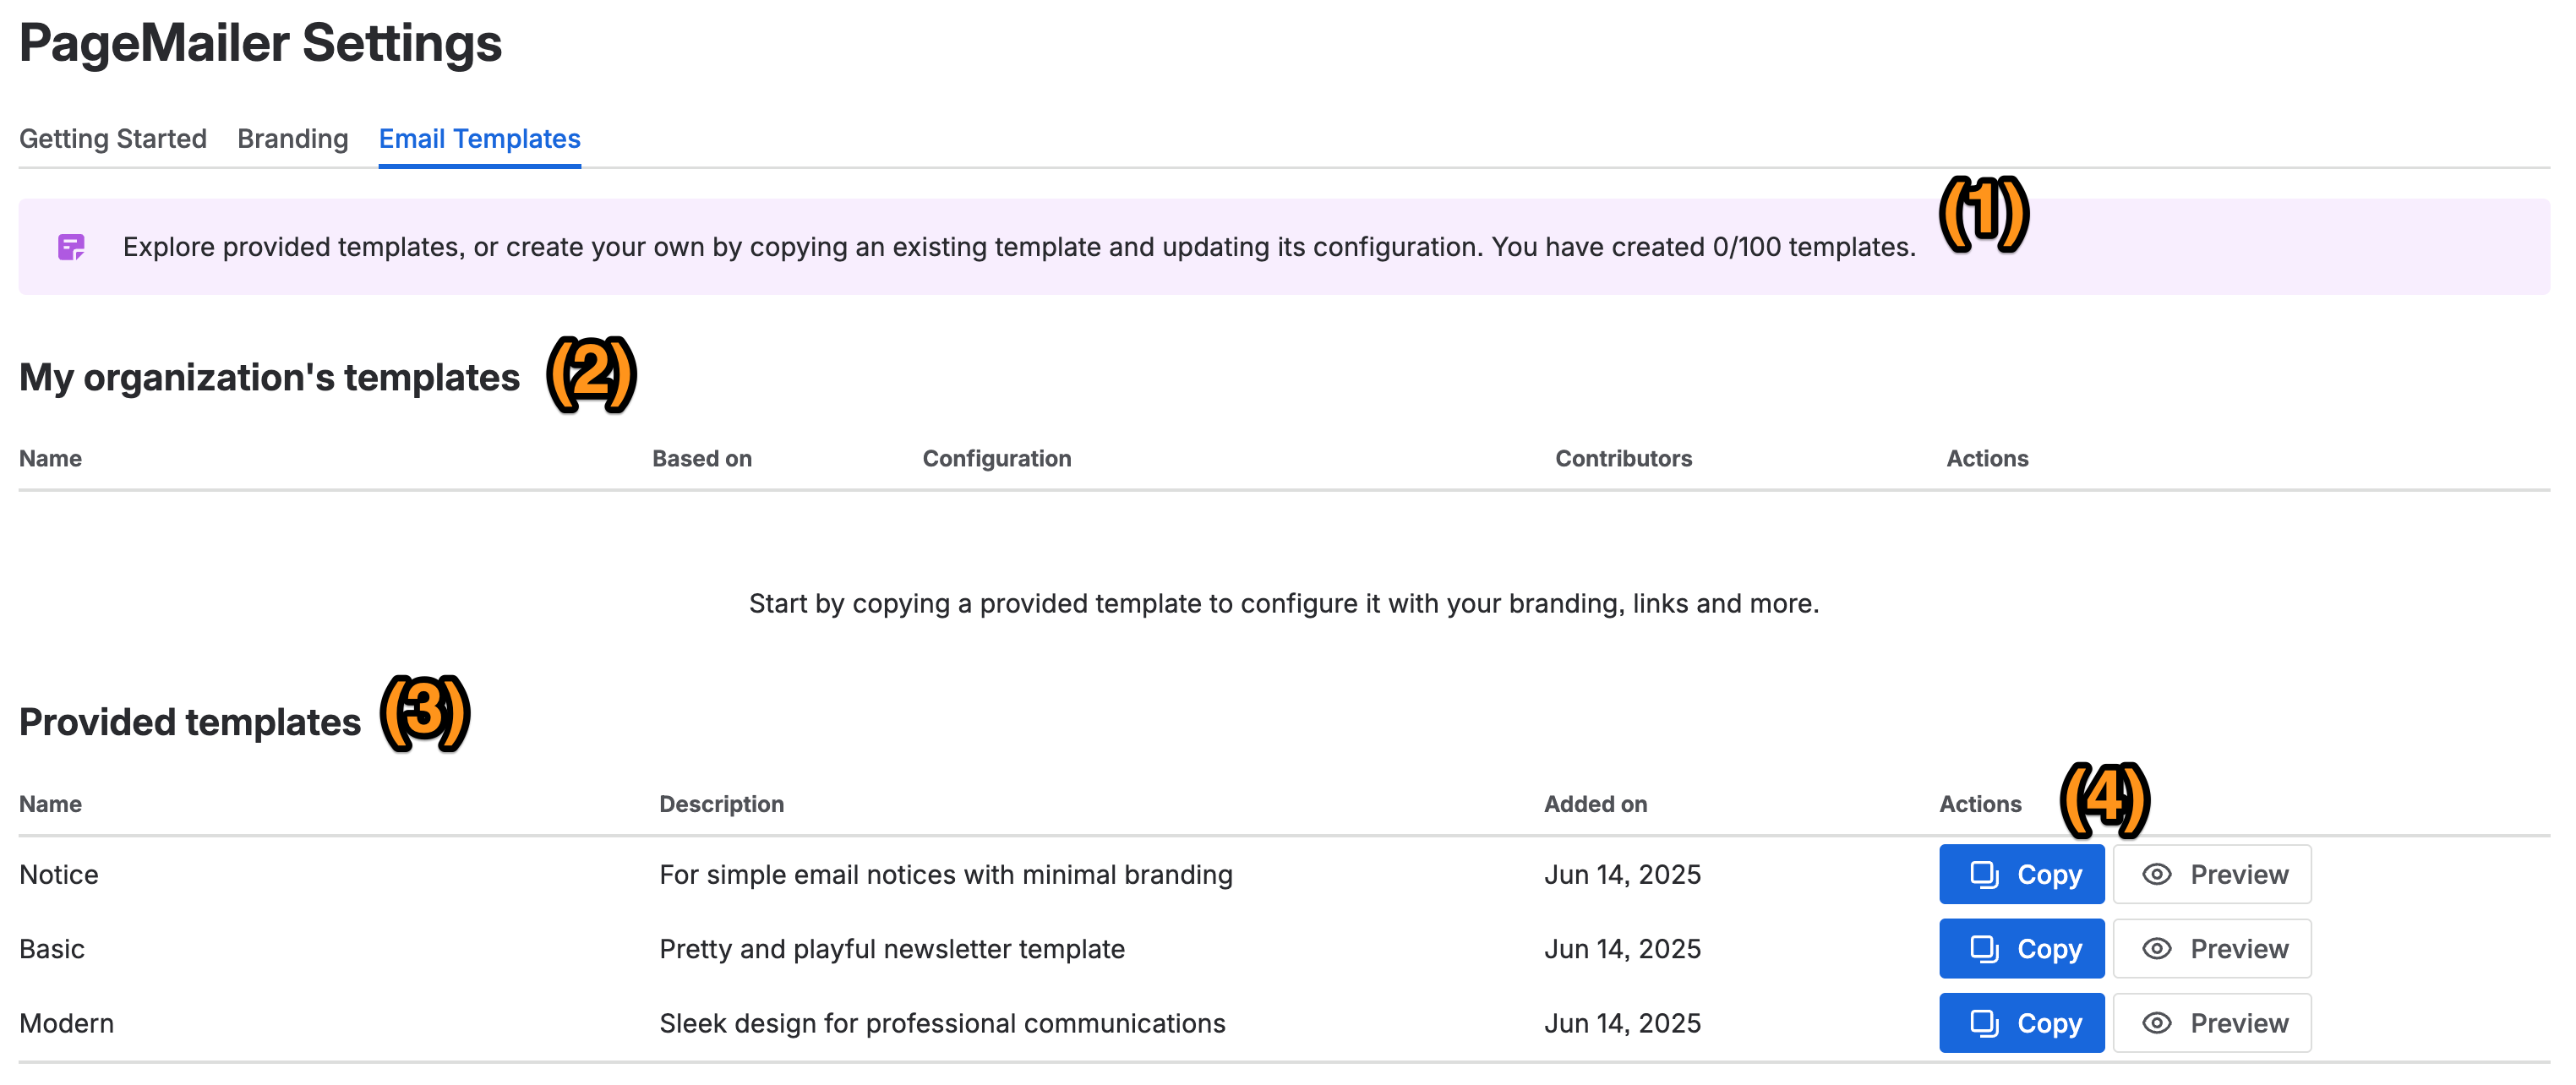
Please refer to the annotated image, and read the following legend:
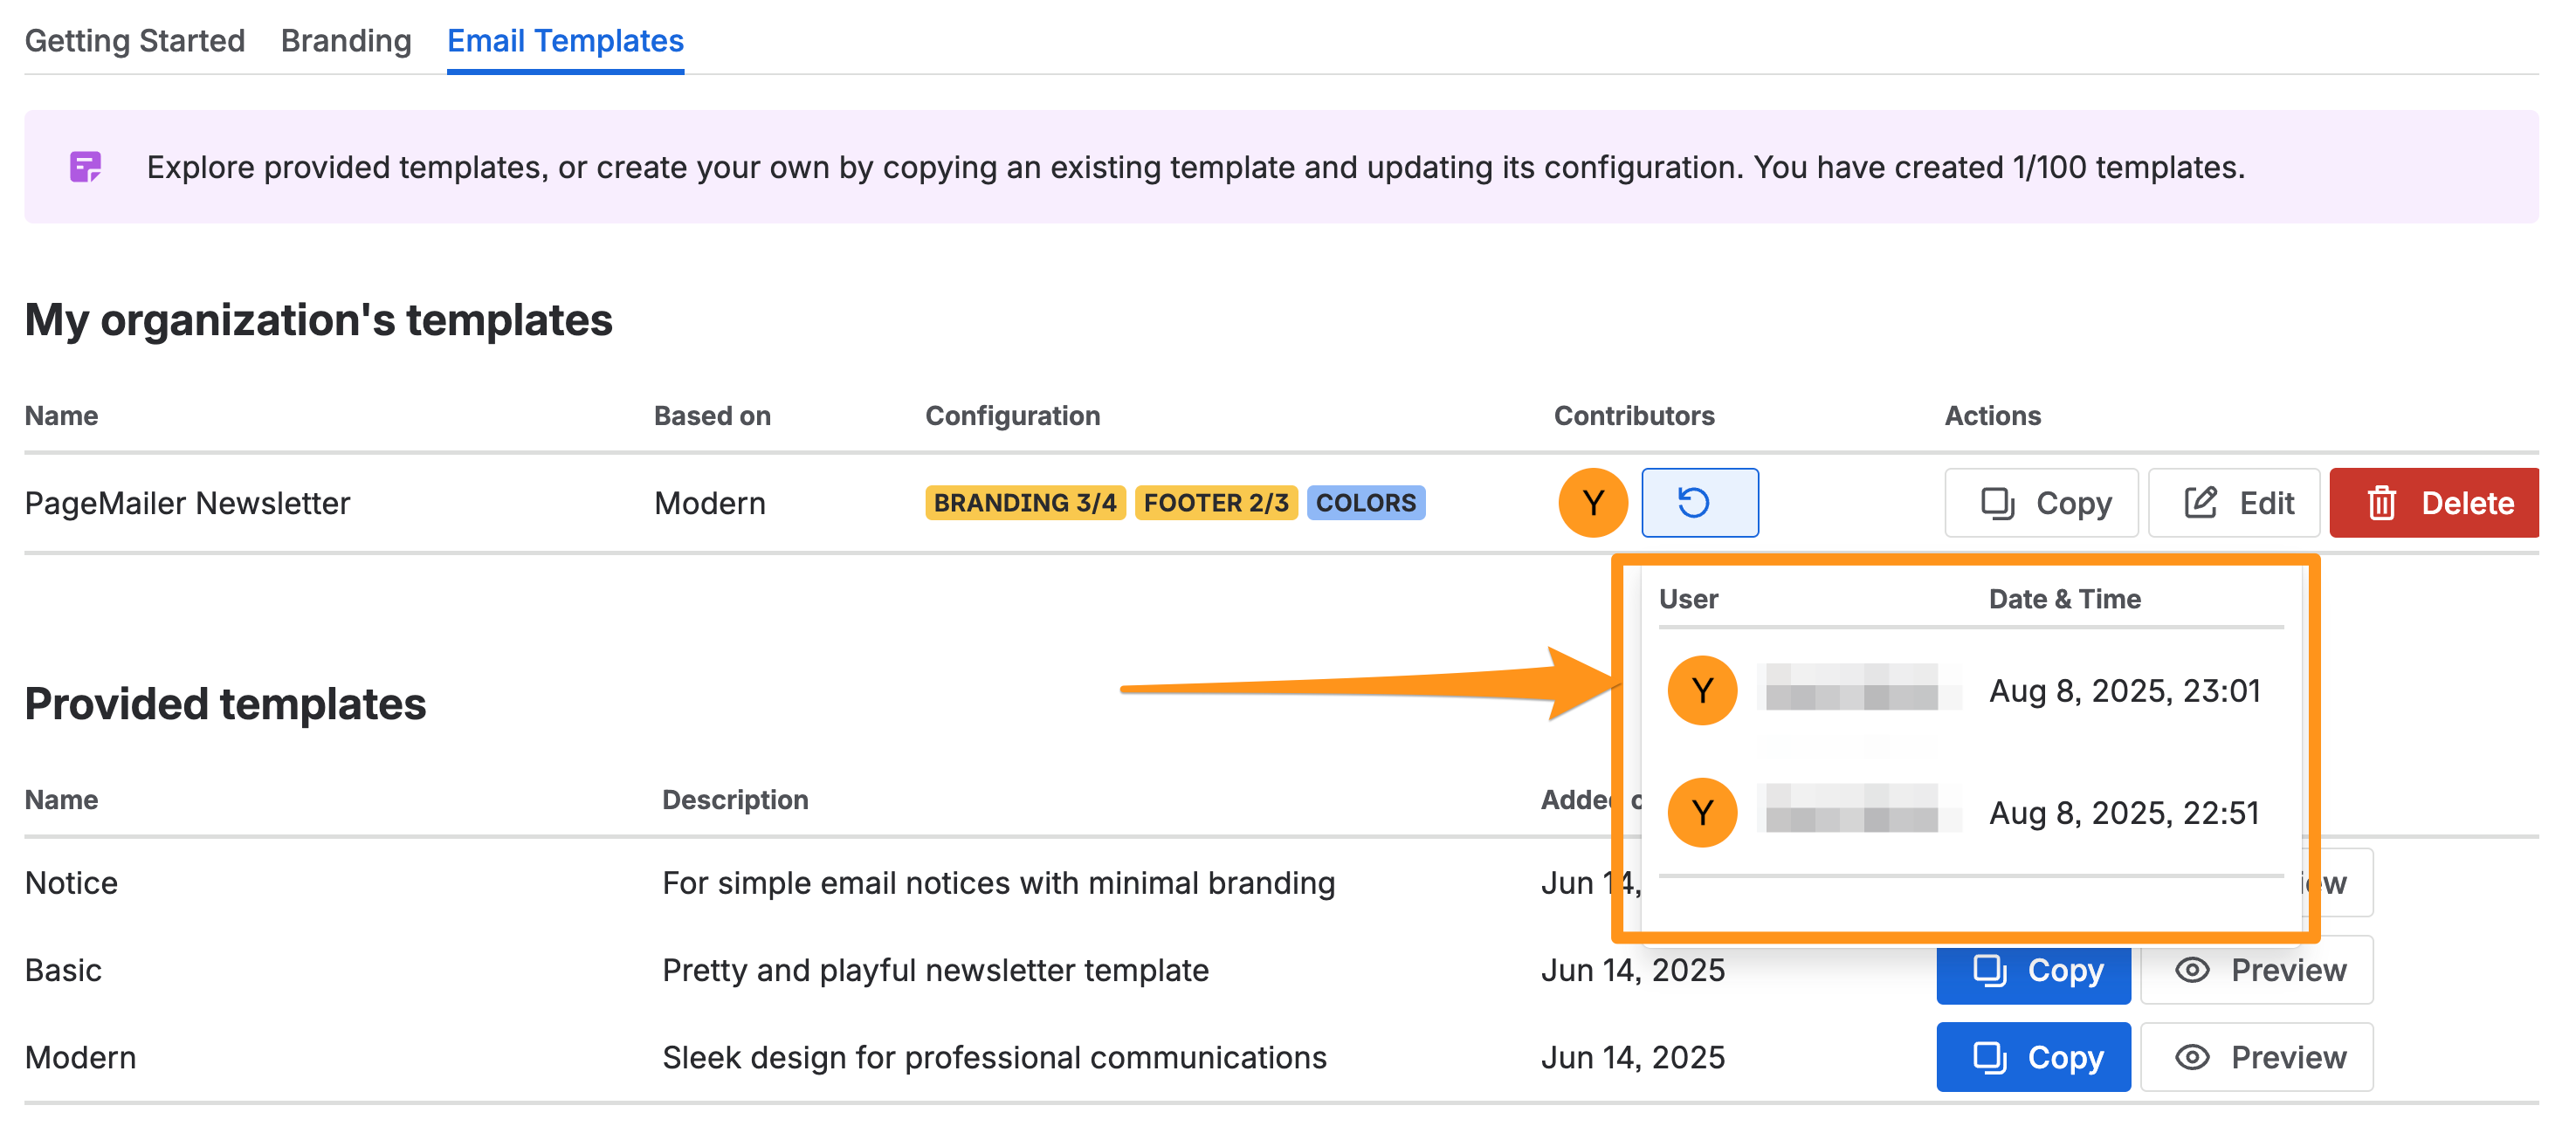
- You can create up to 100 templates for your organization, and will see a count in the top panel.
- The first section/table is for custom templates created and managed by your organization. You can create a template by copying a template provided by PageMailer. You will then be able to modify its settings, assign logos, colors, and more.
- This is the list of provided templates which PageMailer comes with. If you would like to request more base templates to be added, please contact us through our support channel. Alternatively, PageMailer supports an advanced setting allowing you to write your own HTML & CSS in your custom templates.
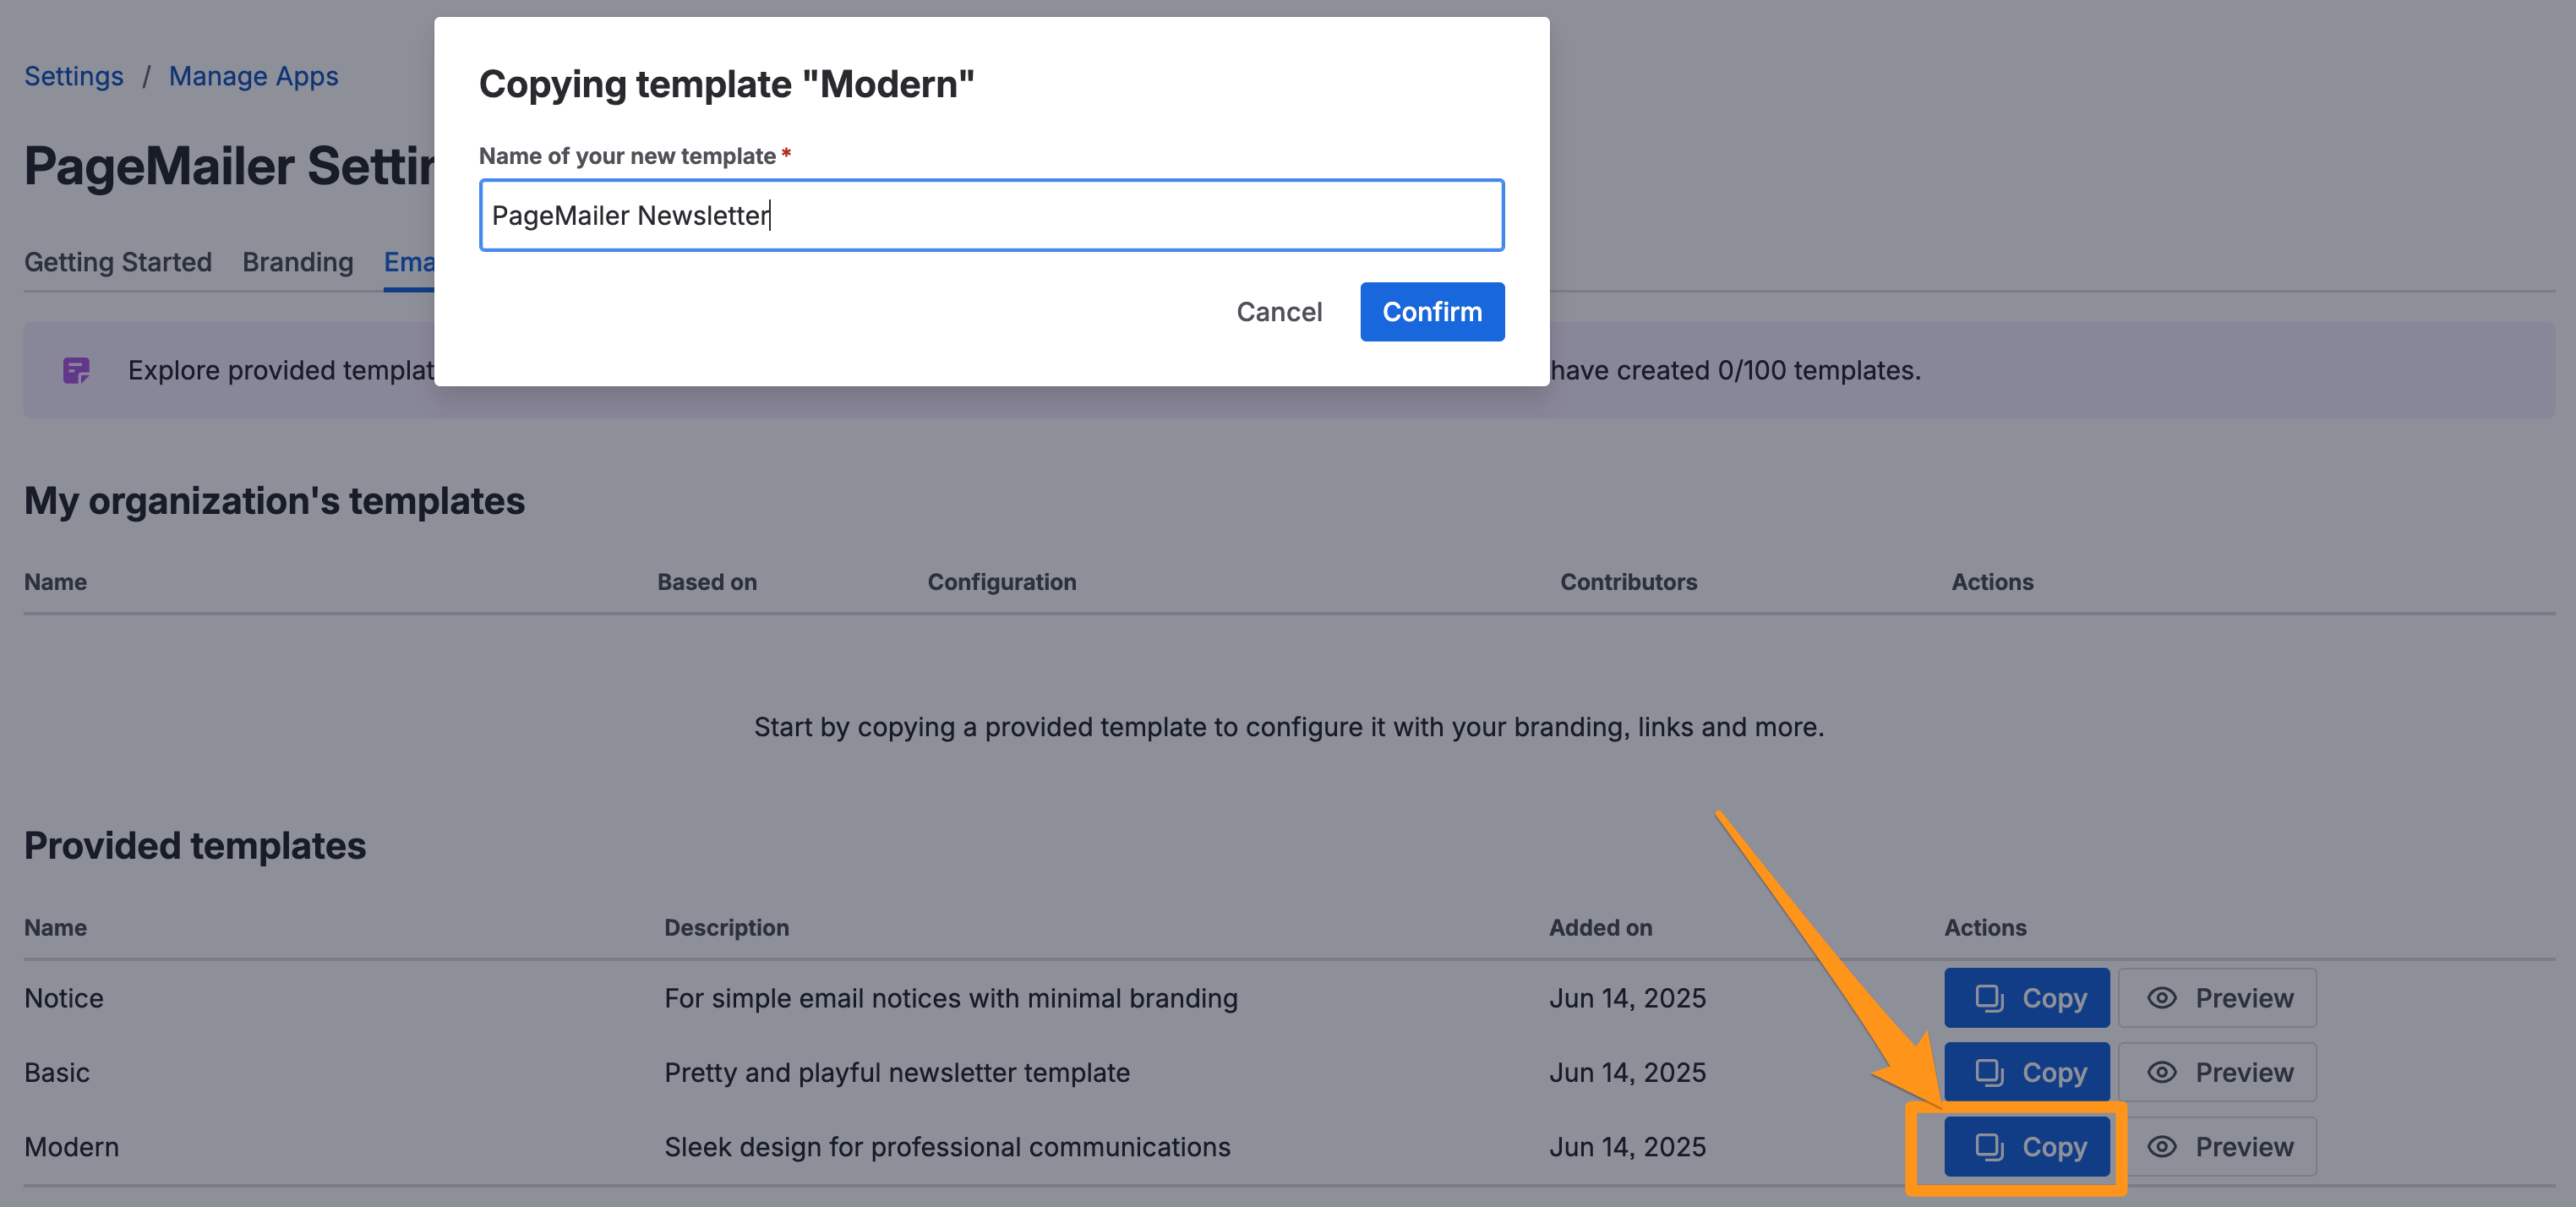
- Get started by previewing templates and copying them to make them your own. You can copy the same template multiple times and configure it differently.
You can preview provided templates and input your own configuration to see what it would look like with your branding.
Keep in mind that any changes made in this window cannot be saved into a new template, you must first copy one and edit it.
Alternatively, once you have created at least one template under your organization, you may also copy it if you wish to start from its configured options.
If you need any help or are encountering any bugs, please visit our support page.
Configuring templates
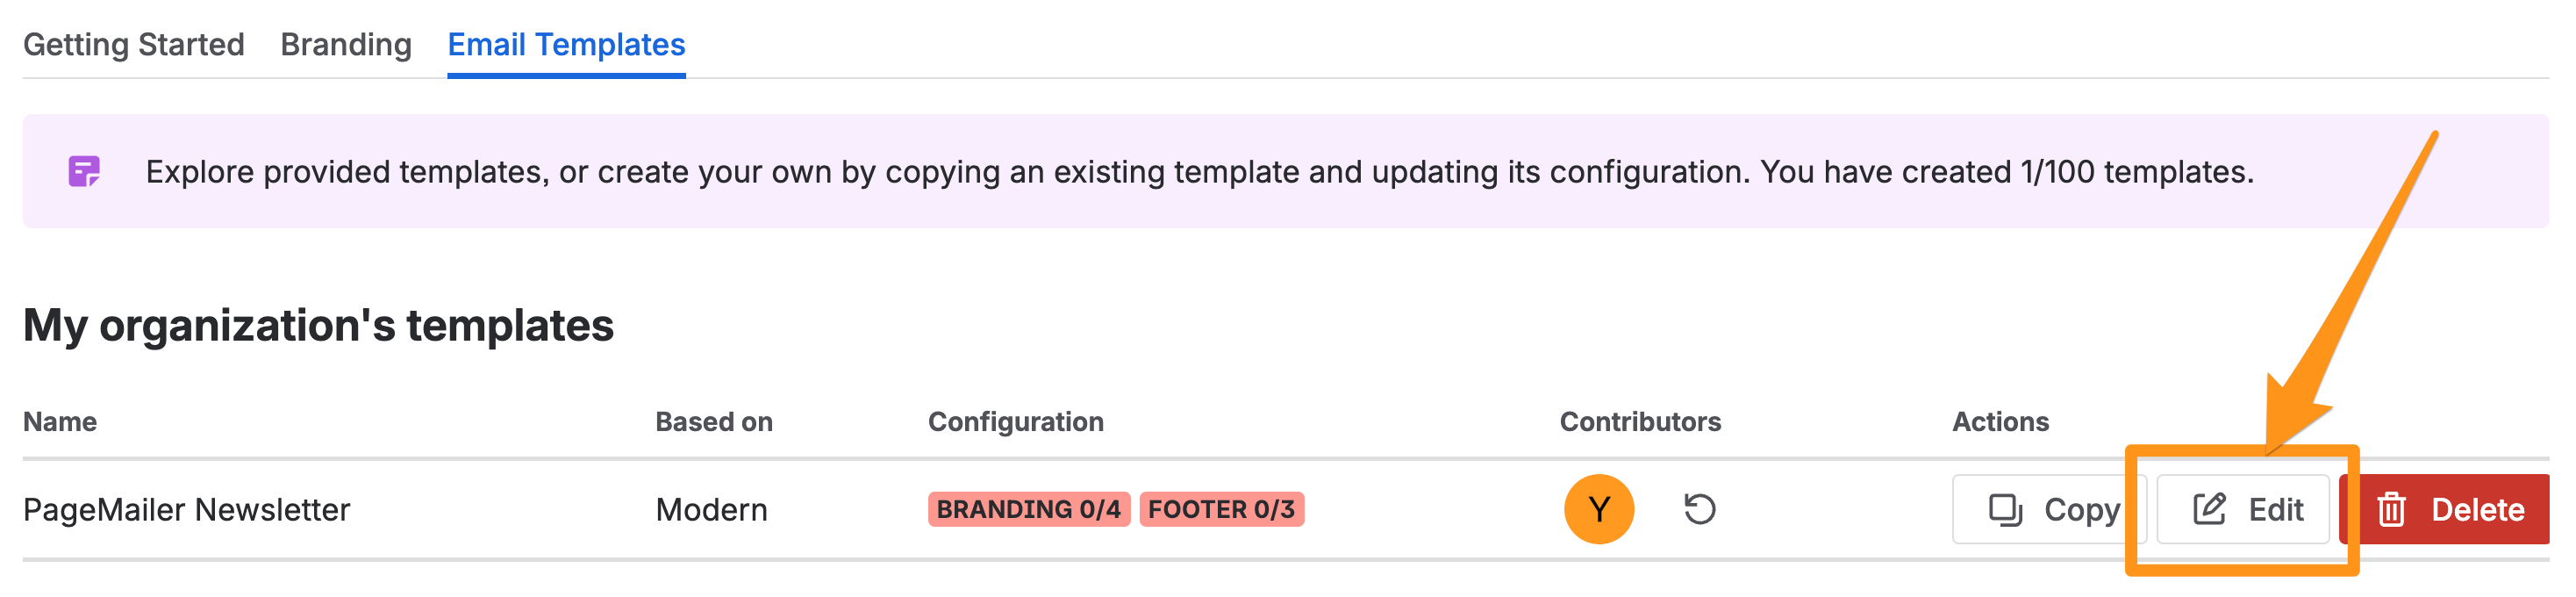
Once a template has been created, it will appear under My organization’s templates. You can click the Edit button to bring up its configuration.
All the configuration options should now be shown, like this:
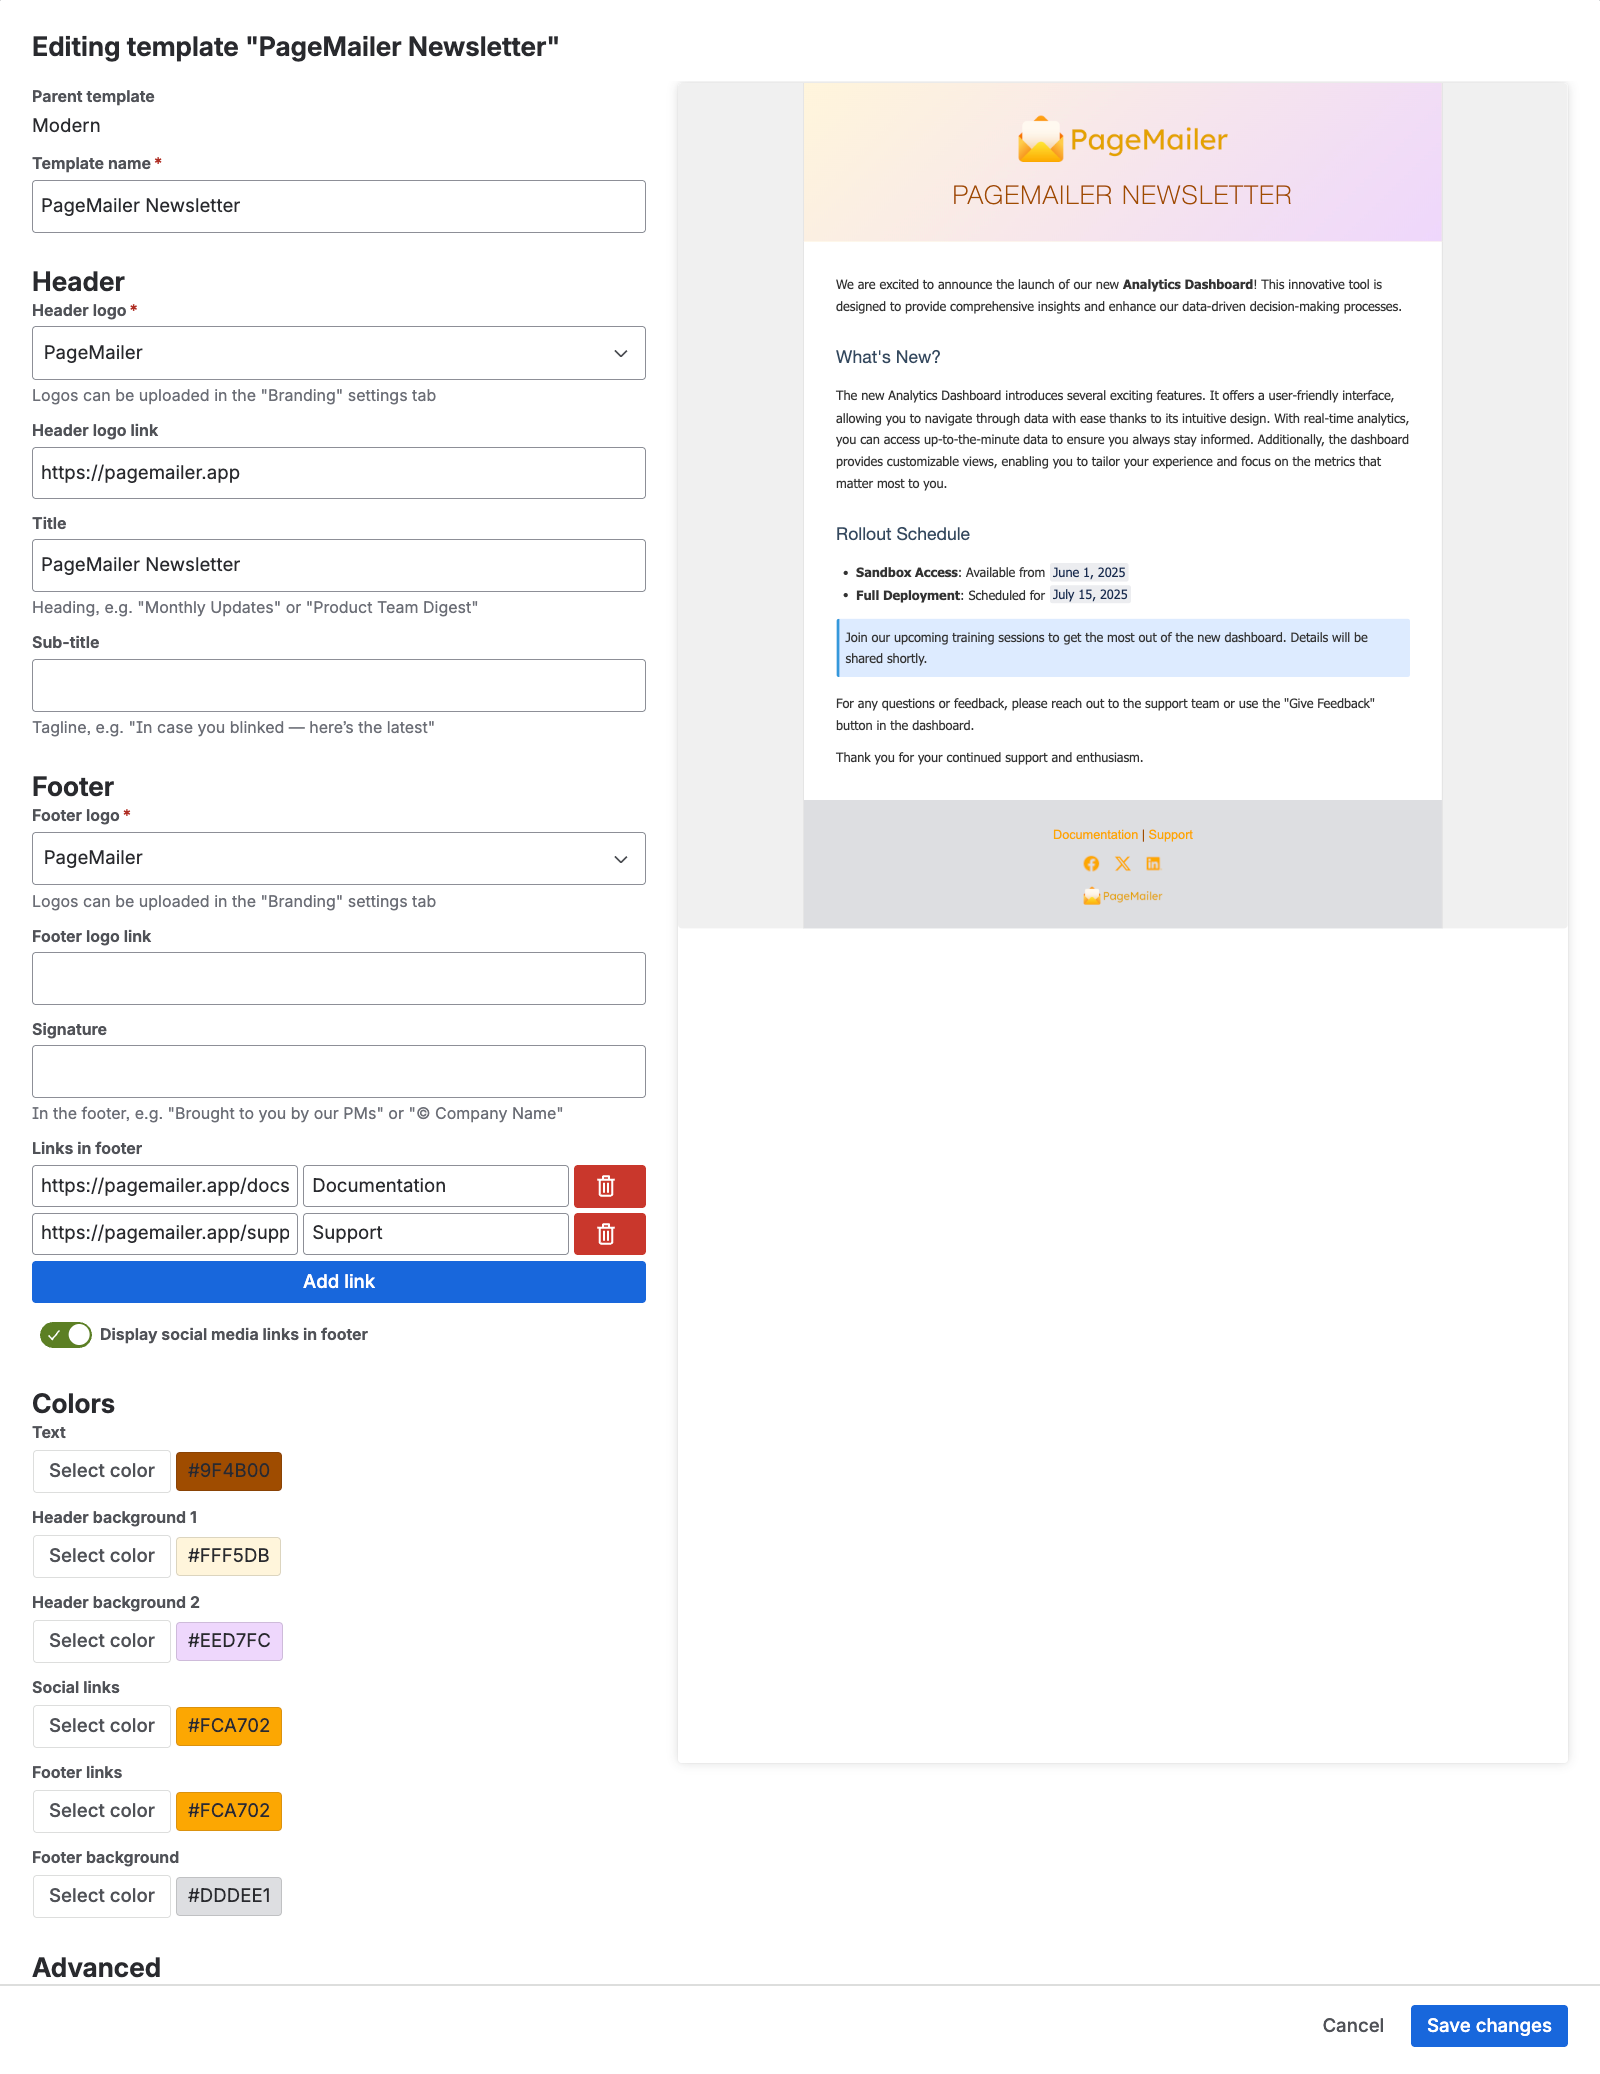
From this screen, you can configure the following:
- Header
- Logo: optional reference to an uploaded logo under the Logos & Socials tab.
- Logo link: only when a logo has been selected.
- Title and sub-title: optional text, typically shown below the logo (depends on the base template).
- Footer
- Logo: optional reference to an uploaded logo under the Logos & Socials tab.
- Logo link: only when a logo has been selected.
- Signature: optional text, typically used to sign your team or company name, but can be used to say anything!
- Links: you can add custom links in your footer, to anything you’d like to direct your user to – such as documentation, policies, and more.
- “Display social media links” checkbox: displays the links configured under the Logos & Socials tab (if any).
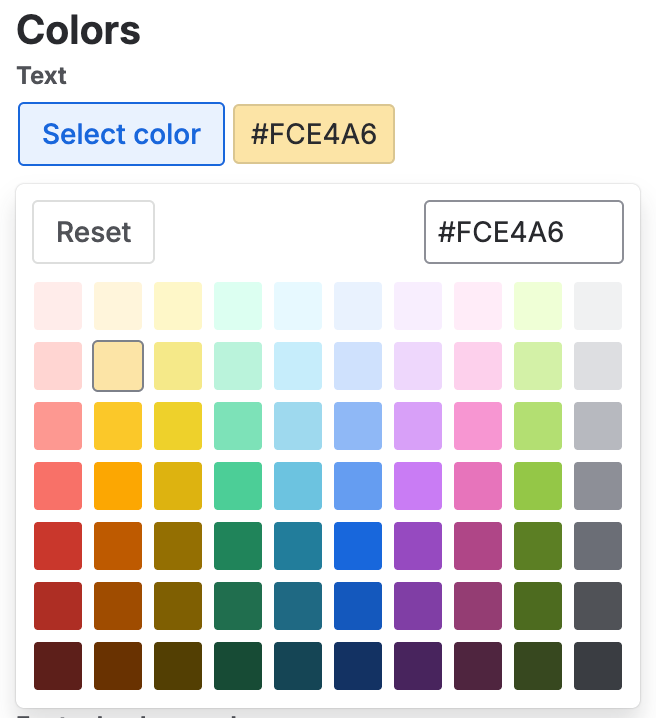
- Colors: truly make this template your own! Select your brand’s colors using the color picker, or enter the hexadecimal code directly.
- Custom HTML: you can learn more about this advanced feature here.
Do not forget to save your template frequently to avoid losing your work!
Preview changes
When updating your template’s configuration, the live preview on the right side should update and display the latest changes.
Template history
Contributors and metadata relating to the changes made to a template are available in the table, by clicking on the button next to the Contributors’ profile pictures.
Next steps
With your branding and template settings all set up, learn more about sending a page as an email.